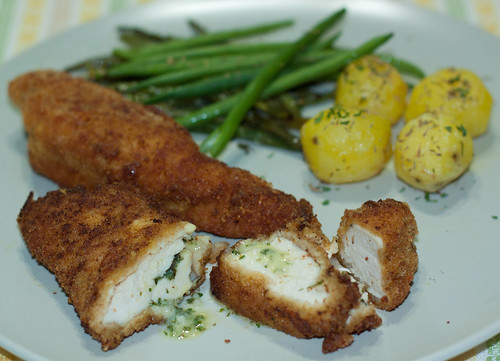
This dish is crispy on the coating and filled with melting garlic butter on the inside. It is one of the family favourite, do make extra to keep a few portions in your freezer for a quick midweek meal.
Always freeze on the day that you make them. You can freeze each Kiev on a flat baking sheet until firm, then wrap well in a cling film or transfer to a freezer bag for up to 3months. For best results, cook from frozen. Simply put them on a baking tray and cook in a pre-heated oven at 180C for 45-50min, turning halfway through.
If you find it too troublesome to make the garlic butter, the flour mixture & breadcrumbs is sufficient to make it delicious too.
Recipe: Chicken Kievs
Makes: 8-10 boneless breast fillets
Ingredients:
• 8 skinless, boneless chicken fillets
• 225g dried breadcrumbs
• 75g Parmesan, grated
• a pinch of chilli flakes for a spicy twist(optional)
• 5 eggs ,beaten
• 100g plain flour
• pinch of paprika (i use 3 dash)
• pinch of salt (i use 3 pinch)
• 4 tbsp sunflower or vegetable oil, for frying
For the garlic butter
• 4 garlic cloves, crushed and finely chopped
• 2 tbsp finely chopped parsley
• 200g butter, softened (i use salted butter)
• juice of ½ lemon
Method:
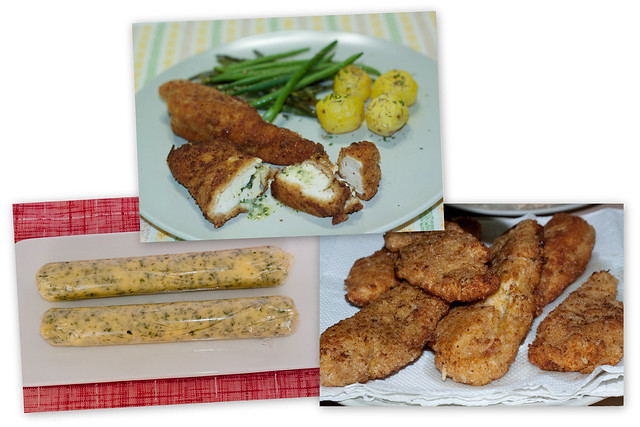
1. Place all the garlic butter ingredients in a bowl and season well. Mash with a fork until well combined, shape into two sausages using sling film to help you shape it, then tightly wrap and chill or freeze until really firm. This can be made up to 3 days in advance. When firm, slice each into 8 even pieces.
2. Lay a chicken breast on a chopping board and use a sharp knife to make a deep pocket inside the breast. The easiest way is to push the point of a knife into the fat end, and keep going halfway into the fillet. Be careful not to cut all the way through or the butter will leak out when cooking. Repeat with the remaining breast.
3. Push 2 discs of butter inside each chicken breast, press to flatten and re-seal with your hands. Set aside.
4. Mix the breadcrumbs and Parmesan (and chilli flakes if you are using) on one plate, and top the eggs onto another. On a third plate, mix the flour with Paprika and some salt.
5. Dip each breast in the flour, then the egg and finally the breadcrumbs, repeating so each Kiev has a double coating (this will make them extra crisp and help to keep the butter inside). Chill for at least 1 hr before cooking, or freeze now for midweek meal.
6. Heat oven to 180C. Heat the oil in a large frying pan over a medium-high heat. Fry the Kievs for 2-3 minutes each side until golden - you may need to do this in batches. Transfer to a baking tray and cook for 20-25 minutes until cooked through.
You can try stuffing with ham and cheese for kids. They would prefer a finely diced ham and grated cheddar instead of butter.
Top it off with you favourite vegetables. I chose fine beans and new potatoes, you can either boil them or bake them and garnish with the balance garlic butter. Bon appétit!
Inspired by: Lucy Netherton
No comments:
Post a Comment